Email Marketing
4 Steps To Create A Family Newsletter With Gmail
Dec 17, 2013
If you want to create a family newsletter with Gmail and send it to a personal mailing list of family members here’s how to do it in just a few minutes.
You may want to do this to update everyone at Christmas about the year that was or if you’ve gone on an epic trip to Africa you may want to share your experiences. It’s your family and your family newsletter so take your pick.
Step #1 : Assemble your content
It’s best not to cram your family newsletter with too much content, no matter how interesting you think you are. The idea is to put enough in it that makes it personal while giving Aunt Betty the option of scanning through and cherry picking the good stuff she is interested in.
Given this a digest style email is best because it contains brief summaries and links back to the fuller content.
You’ll probably have a bunch of content from different sources.
- New stuff you’d like to write here and now
- Picture albums
- Youtube videos
- Stories from your blog
- Funny stories online
Step #2 : Create your email in Gmail
Make sure you’re set up with Flashissue first.
Upload a nice banner if you like. Try and make it 600 pixels wide and not more than 250 in height.
Quick tip: Take a quick screen shot showing part of a webpage (for Windows / for Mac). It’s a great way to create a banner in just a few seconds.
Add a content section at the top and write an introduction. You can insert the code %{first_name}% to start your your family newsletter so it will be addressed to the family member personally. This will be pulled from the name of the recipient you include in your mailing list.
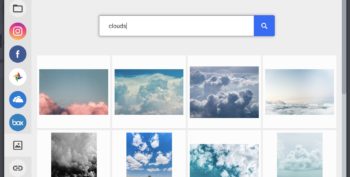
Put in a couple more section breaks, for things like photos and videos. You can insert a video using the content gallery on the right, just paste the URL of a video in the Stories tab. You can then drag it into the email and tidy up the summary text. The same applies to any link to a web photo album like a photostream on Flickr.
Step #3: Build your family email list
Now it’s time to organize your family into a mailing list. This not only makes it nice and easy to send out to everyone in one go but it’s also available to you for using with subsequent mailings now you’ve become the pro of family newsletters.
Click the Lists tab and then the red Create List button. You’ll be able to include anyone from your Google address book in the list.
Step #4: Send and track your family newsletter
When you’re ready to send your family newsletter go ahead and select your mailing list from the Lists drop down in the Editor tab and click Send.
You have the added bonus of being able to track your family newsletter and see who open it and what the click on. This might be useful if your want to un-inivite anyone from your grand birthday bash next year because they failed to read your lovely scribblings.
Here’s the finished example of the family newsletter I created for my fictitious family. Click this link.
Install Flashissue here if you need to.
Related articles

Continue reading


